
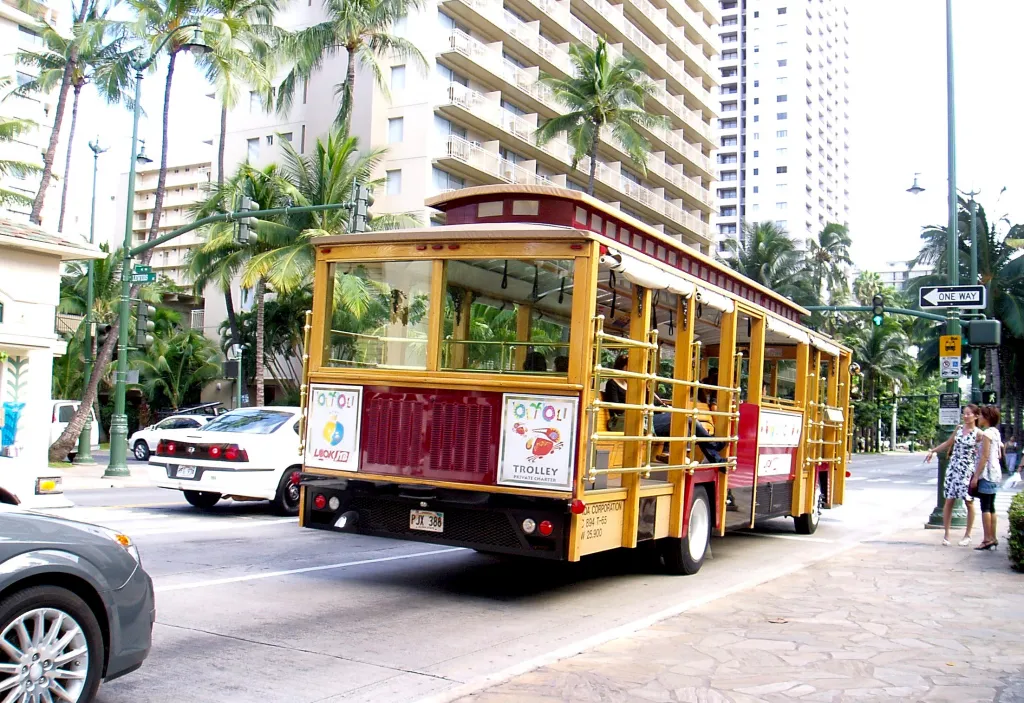
Like Goldilocks sizing up what fits, you’ll find Waikiki Trolley loops land in a sweet spot between quick and all-day. You can knock out the Pink shopping circuit in about an hour, plan 70 minutes for Green, around 100 minutes for Red, and save 2 to 2.5 hours for Blue, with Purple running close to two hours end to end, then tack on 15 to 30 minutes for traffic, boarding, and photo stops. The trick is timing transfers so you’re not stuck in the shade watching buses roll by…
Key Takeaways
- Blue Line takes about 2–2.5 hours per full loop; only four daily runs, so build extra wait time.
- Red Line Historic Honolulu loop is roughly 100 minutes; expect about 50 minutes between trolleys.
- Green Line Diamond Head loop runs about 70 minutes; arrives about every 35 minutes for easier hop-on timing.
- Pink Line shopping loop is about 60 minutes end-to-end; typically comes every 10 minutes for quick, flexible trips.
- Traffic and boarding often add 15–30 minutes near Waikiki and Ala Moana, especially during rush hour or events.
Waikiki Trolley Route Times + Frequency (Quick View)
Most days, you can time the Waikiki Trolley like a well-run beach day, pick your line, check the loop length, then hop on without overthinking it.
Like a well-run beach day, time the Waikiki Trolley: choose your line, check the loop, hop on easy.
For a quick read, the Blue Line takes about 2.5 hours per loop and runs four times daily, so you’ll plan around set departures.
The Red Line clocks roughly 100 minutes, with frequency near every 50 minutes, handy if you’re bouncing between sights.
The Green Line is your shorter scenic spin at about 70 minutes, showing up about every 35 minutes.
The Pink Line is the easy, frequent shuttle, about 60 minutes per loop and often every 10 minutes, great for quick errands.
If you’re weighing options, Blue vs Red route comparisons can help you match loop length and frequency to your sightseeing style.
The Purple Line runs about two hours end-to-end, arriving every 60 to 70 minutes today.
Blue Line: 2–2.5 Hours (Best Stops + Timing)
Plan on about 2 to 2.5 hours for the Blue Line panoramic loop from T Galleria to Kahala Mall and back, and give yourself a little buffer because Honolulu traffic and boarding can stretch it past that in peak season.
You’ll hit can’t-miss coastal views at the Duke Kahanamoku Statue, Sandy Beach, Sea Life Park, and Halona Cove, with quick five-minute photo pauses at Hanauma Bay and Halona Blowhole that keep things moving, so have your camera ready and your water bottle within reach.
Along the way, the Blue Line doubles as a mini food crawl with local eats sprinkled between those coastal lookouts.
With roughly four runs a day spaced about 35 to 40 minutes apart, you can time your ride like a scenic road trip on rails, hop on earlier for softer morning light, or later if you’d rather chase that brighter blue ocean.
Must-See Coastal Stops
Often, the Blue Line feels like a mini coastal road trip you can take without touching the steering wheel, looping for about 2 to 2.5 hours from T Galleria out past East Oahu’s best lookouts and back, with only a handful of runs each day so timing matters. Along the way, the Blue Line is known for its top stops and scenic viewpoints that make the coastal loop feel especially photo-worthy.
You’ll pass the Duke Kahanamoku Statue, then swap towers for cliffs. Halona Blowhole and Halona Cove are 5-minute photo stops, you can’t get off, so frame the spray and Eternity Rock quickly. Hanauma Bay is a drive-by, pretty for a snapshot, not snorkeling.
For sand underfoot, hop off at Sandy Beach for 30 to 45 minutes of wind and shorebreak. Sea Life Park is another hop-off, plan 30 to 60 minutes, then rejoin toward Kahala Mall.
Realistic Ride Time Tips
Because the Blue Line only loops a few times a day, your ride time isn’t just a neat 2 to 2.5 hours, it’s a little puzzle of boarding waits, quick photo pauses, and where you choose to hop off.
Carry a timetable, it runs about four times daily, and you’ll land close to 2 to 2.5 hours unless lines build at Waikiki Beach or Kahala Mall.
At photo-only points like Hanauma Bay and Halona Blowhole, you get five minutes to snap from your seat, so keep your camera out.
If you’re planning a Diamond Head morning on the Waikiki Trolley Green Line, build in extra time for that detour before you commit to a tight Blue Line loop.
If you’re treating it as a Hop-On Hop-Off Tour, choose one long stop, Sandy Beach for a swim or Sea Life Park, add 30 to 90 minutes plus cushion so you don’t miss the trolley.
Still comparing Hanauma Bay?
Ask for tour ideas, hotel suggestions, or a simple trip plan that combines both.
Trip Helper
Red Line: ~100 Minutes (Downtown/History Timing)
Plan on about 100 minutes to ride the Red Line’s full historic loop from T Galleria to Hilton Hawaiian Village, so you can cover downtown highlights in roughly a two-hour window if you stay mostly on board.
You’ll want to budget your hop-offs at classics like Iolani Palace, the Honolulu Museum of Art, Foster Botanical Garden, Aloha Tower, and Ala Moana Center, since those stops sit neatly along that same loop and it’s easy to lose track of time once the city starts buzzing.
This route is often billed as the Historic Honolulu Highlights loop, making it a solid pick if you want a downtown-focused ride.
With trolleys coming about every 50 minutes and traffic sometimes slowing things down, pad your schedule if you’ve got a tour booking, and keep a quick snack and water handy for the warm, stop-and-go ride.
Typical Full-Loop Duration
If you’re carving out time for Honolulu’s downtown history, the Waikiki Trolley Red Line makes a full loop in about 100 minutes, rolling past big-name stops like Iolani Palace, Foster Botanical Garden, the Honolulu Museum of Art, Aloha Tower, and Ala Moana Center.
That end-to-end ride uses most of a two-hour window, so you’ll want to time lunch, reservations, or beach plans around it. Keep these practical cues in mind:
- Expect 50-minute headways, so departures feel like a slow tide, not a metro.
- For hop-on hop-off days, add your visit time plus up to another 50 minutes to reboard.
- Downtown traffic at rush hour or event nights can stretch the advertised 100 minutes.
- Bring water, sit street-side, and watch murals and cranes slide by.
If you want a half-day plan, the Red Line also works well as a Historic Honolulu highlights run through Waikiki’s downtown core.
Best Stops To Budget
That 100-minute Red Line loop feels like a mini time capsule of downtown Honolulu, but the real magic happens when you step off and give a few headline stops the time they deserve.
Treat it like a hop-on hop-off sampler, then budget your day around the best tourist attractions. To keep the day smooth, follow a best stop sequence that prevents backtracking between Red Line highlights. At Iolani Palace, allow time for entry and 45 to 60 minutes to tour the royal rooms.
The Bishop Museum rewards a longer pause, plan 1.5 to 2 hours for main exhibits and the cool halls. If you pop into the Honolulu Museum of Art, 60 to 90 minutes covers highlights.
Foster Botanical Garden needs 30 to 45 for shade and photos, while Aloha Tower takes 20 to 30 for a snack and waterfront views.
Green Line: ~70 Minutes (Diamond Head Loop Timing)
Often, the Waikiki Trolley’s Green Line feels like the easiest way to “do Diamond Head” without turning your day into a logistics puzzle, since it runs a roughly 70-minute loop from T Galleria to the Waikiki Gateway Hotel.
The Waikiki Trolley’s Green Line makes “doing Diamond Head” simple, looping about 70 minutes from T Galleria to Waikiki Gateway.
You’ll see a trolley about every 35 minutes, so missing one isn’t tragic, but it does shape hop-on hop-off tours, especially if you stop to snap photos or grab shave ice.
Key stops you can plan around include:
- Diamond Head lookout for breezy crater views
- Honolulu Zoo for a quick wander
- Waikiki Aquarium for cool, dim reef tanks
- KCC Farmer’s Market on Saturday mornings
As part of the Diamond Head Express Green Line loop, plan a bit of extra time if you want to linger at the lookout or fit in a quick photo stop.
Traffic can stretch the circuit at rush hour or during events, so pad your timing if you’re meeting friends or catching reservations.
Pink Line: ~60 Minutes (Shopping Loop + Most Frequent)
Usually, the Waikiki Trolley’s Pink Line works like your quick shopping shuttle, circling its full route in about 60 minutes and showing up roughly every 10 minutes, so you can duck in and out without planning your whole day around a timetable.
Start at T Galleria, roll past DFS Galleria and the Duke Kahanamoku Statue, then head to Ala Moana Center before looping back to Saratoga Road by Eggs ‘n Things.
Because stops sit close together, you’ll spend more time browsing shops than waiting curbside, and boarding stays brisk outside Waikiki hotels.
Use it for sunscreen, snacks, or a last minute gift, hop off, grab what you need, then hop on again.
This shopping loop stays predictable, and frequent connections make repeat trips easy.
It’s essentially the Waikiki Trolley Pink Line for shopping and Ala Moana basics.
Plan Your Day: Waits, Transfers, and Traffic Buffers
When you map out a Waikiki Trolley day, treat the schedule like island weather, mostly reliable but prone to sudden slowdowns, so you’ll travel smoother if you plan for waits, clean transfers, and a little traffic cushion.
Plan your Waikiki Trolley day like island weather, usually reliable, sometimes slow, so build in waits, clean transfers, and a traffic cushion.
Most lines run every 10 to 70 minutes, so time your transfers, and give yourself breathing room at major stops, especially on Red and Blue.
If you’re estimating segments, use stop-to-stop travel times as a baseline and then layer in your wait and traffic buffers.
- Build a 15 to 30 minute traffic buffer near Waikiki and Ala Moana at rush hour
- For hop-on/hop-off sights, plan 30 to 90 minutes on the ground, plus the next headway
- At T Galleria, Ala Moana Center, or Waikiki Shopping Plaza, assume one full headway for transfers
- For timed entries, show up 20 to 30 minutes early and take an earlier trolley
Frequently Asked Questions
Are Waikiki Trolley Tickets Valid Across Multiple Lines on the Same Day?
Yes, if you’ve got multi line passes, you can ride routes with unlimited rides and same day transfers, following the line hopping policy. Single-line tickets can’t, due to transfer limits; check day pass validity in email/app.
Do Route Durations Change Significantly During Holidays or Major Local Events?
Yes, during holidays and big events, you’ll see major shifts: holiday crowds and parking shortages slow boarding, traffic diversions and route detours add miles, event schedules trigger service extensions, so you should budget 20–50% longer.
Is the Trolley Wheelchair-Accessible, and Does Boarding Take Extra Time?
Right off the bat, yes, you’ll ride accessibly; wheelchair boardingtimes can add 3–5 minutes. You get accessible seating, choose ramps vs lifts, follow priority policies, request driver assistance, and ask about space reservation before you board.
Can I Bring Luggage, Strollers, or Large Beach Gear Onboard?
You can’t bring bulky luggage or oversized items onboard; follow luggage policies and carry on limits with lap/under-seat bags. Use stroller folding for full-size strollers. Leave big beach gear behind or use storage lockers nearby.
Are Restrooms Available Onboard, or Only at Certain Stops?
No, onboard restrooms? You’d burst like a geyser before finding one, so hop off at major stops. Follow restroom signage, expect regular cleaning frequency, mind restroom etiquette; restroom accessibility beats portable toilets at photo stops.
Conclusion
Treat the Waikiki Trolley like a set of tide charts, you’ll enjoy the ride more when you plan for the swell. You can loop Pink in about an hour, Green in 70 minutes, Red in around 100, and Blue or Purple closer to two hours or more, then add a 15 to 30 minute cushion. Show up early when Waikiki feels busiest, keep water handy, and use longer lines for photo stops, not tight transfers.
