
The first time you watch Halona Blowhole fire, it feels like a giant sea kettle whistling through black lava. You stand on the paved lookout upwind, 10 to 15 feet back, and let a telephoto do the risky work. You tuck behind a low rock wall, poke out just the lens, and listen for that deep inhale before the spray hits. Your hood and cloth are ready, but timing is the real trick…
Key Takeaways
- Stay on the paved lookout and remain 10–15 feet back; never climb down toward wet, algae-covered lava rocks or sea caves.
- Shoot from upwind and at a 45–60° angle to the blowhole so mist blows away from your lens.
- Use a longer lens from 30–50 feet back and crop later instead of moving closer into spray.
- Shield the camera behind a rock windbreak, keep the hood on, and only poke the lens out during lulls between gusts.
- Use short high-speed RAW bursts timed to wave sets, and wipe the front element with a microfiber cloth between bursts.
Safest Halona Blowhole Viewpoints (and Boundaries)
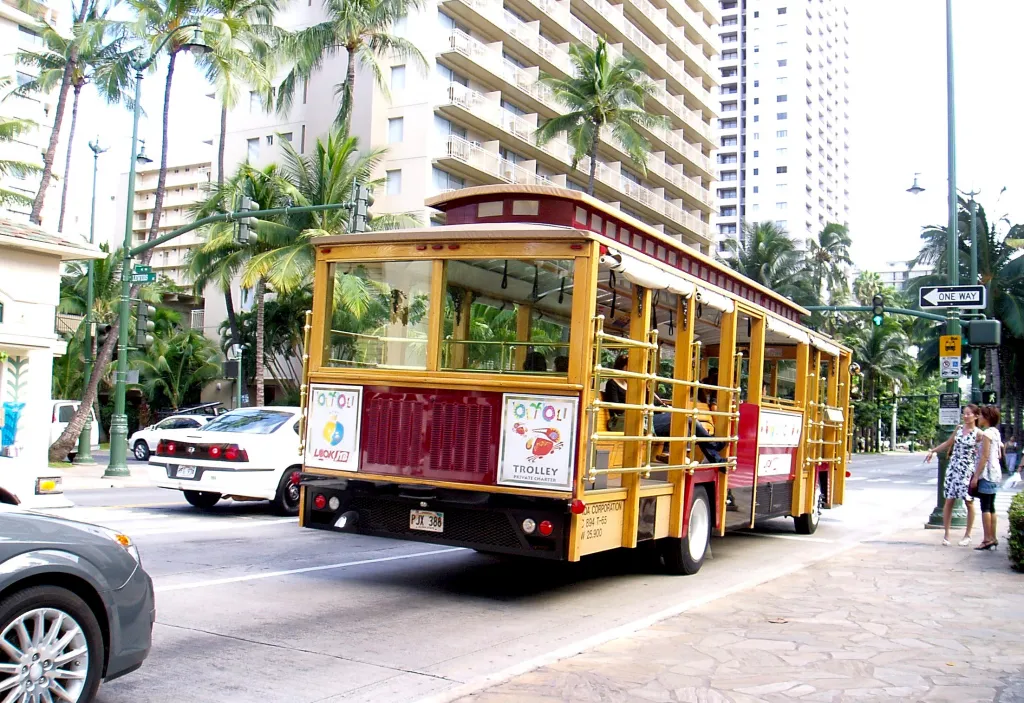
A good photo at Halona Blowhole starts with a simple rule: pick the right perch and stick to it. Stay on the paved lookout platform and in marked viewing areas, even when the spray thunders like a drumbeat below. Don’t step over the low rock wall or ignore warning signs, because the shoreline here is sharp, slick lava with surprise wave bursts. Visitors arriving by the Waikiki Trolley can use the designated stop near the lookout to access these safer, marked viewing areas without wandering onto hazardous terrain.
Keep at least 10–15 feet back from the cliff edge and any wet,algae-covered lava rock where waves can surge unexpectedly and footing is slippery.. Before you raise the camera, watch the sets for a minute. If the swell looks bigger or wind gusts shove mist uphill, treat the boundary as wider and shoot from farther back. Follow lifeguards and rangers, and never climb down toward the blowhole or sea caves. Strap your gear, keep kids close, and let the ocean do the leaning for you today.
Parking, Path Conditions, and Where to Stand
Start with the simple win: park in the Halona Blowhole lot or a legal pullout and get here early, because spaces vanish fast and the walk in can sneak up on you. Once you’re on the path, treat the place like it’s been glazed with sea salt, wear grippy shoes, and stick to the paved viewpoint and fences when the surf is loud. For the best angle without the surprise shower, set up behind the railing and stay 10 to 20 feet back from the lip on windy or high-tide days. If you’re coming from Waikiki without a car, you can ride the Waikiki Trolley to the Koko Marina Center stop and connect from there to the Halona Blowhole lookout.
Parking And Timing
Because the best blowhole shots depend on where you park and when you arrive, treat Halona like a quick photo mission with a little ocean math. Make sure you park in the Halona lot or a Kalanianaʻole Hwy pullout, then walk the paved viewpoint path. Spaces are tight, so arrive 30 to 60 minutes before peak swell. Check tide charts and swell forecasts. Low tide cuts spray, while mid to high tide with strong NE swell, common Nov to Mar, brings taller spits. Stand behind the marked area and low concrete barrier, and use a 70 to 200mm lens from there. If you’re riding the Waikiki Trolley, you can pair your shoot with the nearby Kahala Lookout stop for extra coastal views and backup photo angles.
| Timing | Move |
|---|---|
| Early | Park, prep |
| Low tide | Less spray |
| High tide + NE swell | Big spits |
| Wind | Long lens |
This saves your lens.
Safe Footing And Angles
Step onto the paved lookout like you’re setting up on a ship deck, then keep it simple and smart. Park in the designated Halona Blowhole turnout or marked stalls. Keep your vehicle in sight so you can leave fast. From the halona blowhole lookout, stay on the pavement and official paths. The lava ledges below shine with salt and stay slick, and some edges are undercut by waves. Set your feet shoulder width apart and place one foot forward on ground. That stance gives you safe footing and angles. Face the blowhole at 45 to 60 degrees for bursts with less spray on your lens. Check tide charts. Aim for mid to low tide, then retreat uphill if sets build or wind shifts onshore. If you’re exploring other overlooks like Punchbowl Crater from the Waikiki Trolley, apply the same stay-on-the-path mindset and stable stance to keep your gear and footing secure.
Compose From Distance: Safer Frames That Work
When you stay up on the official lookout at Halona Blowhole, you can still frame the drama without letting the ocean tag your front element. From 30 to 50 ft back on the paved platform, use a telephoto range to compress cliffs and plume, and leave a wide cap of sky. Add a strip of rough lava rock at the bottom so surprise bursts land outside your main focal area. From here, you’re also just a short stop along the Scenic Southeast Oahu Blue Line route, so you can work this lookout into a full coastal photo day.
| Goal | How you frame it | Why it stays drier |
|---|---|---|
| Catch the full blast | Aim for the upwind side | Wind carries mist away |
| Beat random droplets | Shoot 1/500–1/1000s in bursts | You grab clean gaps |
| Stay safe and sharp | Crop later, don’t climb down | Your lens skips splatter |
Watch the time of the day and tides. Higher water often means taller blows, up to 30 ft, plus more spray noise. You’ll hear the whoosh first, then click and grin quietly.
Best Focal Lengths for Halona Blowhole (24–200mm)
You’ll want 24–35mm when you’re after the full scene, with jagged cliffs, the blowhole, and a few brave onlookers set against big sky and salty wind. When the surf starts thumping and the spray pops on a beat you can’t predict, zoom to 70–135mm or even 135–200mm to catch tight water bursts from the safe lookout and freeze those 30-foot jets. If you’ve got a 24–70mm handy, keep it mounted so you can swing from wide context to quick mid shots without fumbling while the ocean laughs at your timing. If you’re riding the Waikiki Trolley route, factor in extra time at Halona Blowhole so you can switch focal lengths and experiment with different compositions before the next trolley arrives.
Wide-Angle Context Shots
A few smart focal-length choices can turn Halona Blowhole from a random splash into a full coastal story. Start wide at 24 to 35mm so you catch the blowhole, black lava rocks, and the long ocean sweep in one frame. Keep those rough foreground stones sharp, and shoot handheld at 1/1000s or faster when the spray gets rowdy. If light shifts after the sun dipped, bump ISO to 400 or 800 and keep moving. Time your session so you can head back toward Waikiki for Waikiki’s Golden Hour while the Sunset Trolley route is still running.
Zoom to 50 to 70mm to tighten the view and make the spout look taller against the cliffs and the lookout crowd. Then reach 100 to 200mm for crisp water columns and crashing surf, but leave a sliver of shoreline for scale. You’ll hear the hiss and feel salt nearby.
Telephoto Burst Timing
Often the best Halona blowhole shots happen the moment you stop trying to outshout the wind and let your telephoto do the work. Zoom to 100–200mm to pin the plume against dark cliff rock and make the jets look bigger without creeping to the edge. If you want place and people, slide back to 70–135mm so the spitting action shares the frame with ledges and foamy surf. Much like timing your shot of Diamond Head to avoid crowds, using distance and perspective at Halona lets you isolate drama in the landscape without jostling for a front-row view.
At 135–200mm switch to continuous high speed burst at 10–20 fps. Each spit peaks in under a second. Hold f/5.6–f/8 and keep 1/1000s or faster to freeze droplets. When backlit spray blows toward the sun, try about 150mm and dial −0.3 to −1.0 EV to save highlights. Listen for the boom, then shoot as the swell lifts.
When It “Spits”: Tide, Swell, and Season Basics
If the blowhole feels sleepy when you arrive, don’t blame your timing on the clock. Blame the ocean’s mood. You’ll see the difference when a rising tide lifts the pool and waves crashing shove water into the lava tube. Higher tide plus a solid swell makes the spout taller and more regular, so aim for incoming water.
Check a tide chart and a swell forecast before you go. Look for a swell period around 6 to 12 seconds, not just big numbers, because that rhythm feeds steady bursts. Winter, especially November through March, usually brings north and northeast swells that turn the spray louder and wetter than summer’s calmer days. After storms, surf over 6 to 8 feet can launch far-reaching plumes, and the rocks feel slick and salty. Time your visit around peak sets, not lunch plans. If it goes quiet, wait a minute and listen again. On days when Honolulu’s official report calls for scattered showers and widespread haze, expect extra mist in the air that can bead on your front element even between blasts.
Read the Wind to Avoid Constant Sea Mist
Before you even raise the camera, read the wind at the designated lookout and let it tell you how wet this shoot will get. Check wind direction first right now. Onshore flow pushes salty mist straight at the cliff, so expect a fine, gritty film on your element. Offshore breezes sweep the plume out to sea and give you frames. If you’re unsure, flick a small ribbon or tissue and watch it snap. A weather app helps too. When gusts climb past 10 to 15 mph here, spray hangs in the air like glitter and finds every gap. Set up upwind of the blowhole’s spout so the breeze carries the burst away from you. Then listen for the lull between swell cycles. Big sets and high tide hit louder and wetter. When the wind turns fickle, keep a microfibre cloth ready and back up with a longer lens. During the next front, hazardous seas with 15–19 ft northwest swells and strong southwest winds will throw extra spray toward exposed lookouts, so plan your shoot for calmer periods.
Use Rocks as Windbreaks (Without Risky Scrambling)
You’ll spot calm pockets of air behind sturdy rocks where the wind hisses overhead and the spray thins out. Pick a stable ledge and let a shoulder-width rock wall block the blast, then keep your feet well back from the edge so you’re not tiptoeing on crumbly lava like it’s a bad idea challenge. Watch the gusts come in sets, and when the wind eases for a beat, pop out for a quick burst and tuck back in before the next salty slap. If you need a breather afterward, you can cool off at one of the shady Waikiki trolley stops that offer quick, sheltered breaks between photo sessions.
Identify Natural Wind Shadows
When the Halona Blowhole starts booming and the trade winds shove mist inland, look for a quick wind shadow instead of playing cliff-edge hero. Check the onshore wind, often from the southeast, then step back and line up a big lava boulder between your lens and the spray. If the weather’s turning wet, you can take a cue from how Waikiki Trolley in the rain routes still run but require more prep, and treat your shooting spot like a moving, rain-aware vantage point. Pick a blocker at least as tall as your shooting height, about 3 to 4 feet, so it eats most droplets. If you’re handheld, tuck your shoulders behind the rock and poke the lens out just enough to frame. You’ll avoid the crowds by drifting to a quieter outcrop. Keep a circular polarizer on, and a microfiber cloth ready for the sneaky mist.
| Wind | Barrier | Result |
|---|---|---|
| SE | Tall rock | Drier glass |
| Strong | Roadside wall | Less mist |
Shoot From Stable Ledges
A good wind shadow buys you a few dry seconds, but a stable ledge makes those seconds count. Set up on the official Halona Blowhole lookout or a rock shelf several feet back from the edge. The Lookout offers a safer angle and the cliff thunders below. Just like when riding the Waikiki Trolley safely with kids, choose designated viewing areas and follow posted guidelines so you’re not balancing photography against unnecessary risk.
Drop into a sit or kneel behind a low wide boulder. Use it like a tripod you can’t forget. Rest your elbows or camera on the stone and let it block sideways mist. Face into the onshore wind with rock at your back, then tweak your angle so spray skims away from your front element. Fire a short burst at 1/1000 to 1/2000s. Keep a microfiber cloth in your pocket and wipe between bursts without scrambling.
Time Sets Between Gusts
Often the best moment at Halona isn’t the biggest blast, it’s the calm right after it. Watch the wave sets for 30 to 90 seconds. Spouts hit in bursts, so time your shots between gusts and raise the camera during the lull after a big set. From the designated lookout, use the big rocks 3 to 5 meters below you as a windbreak. Hold your camera at shoulder height behind a low lava ledge, or cup your hands around the hood. You stay dry and you don’t do sketchy cliff gymnastics. If you’re planning a full coastal photo day, you can pair Halona with a ride on the Diamond Head trolley route to catch golden light at both spots without worrying about parking.
- Salt mist hisses, then fades.
- Your shutter snaps in clean air.
- The ocean booms like a drum.
If spray returns, shoot 1/500s+, keep a microfiber ready, or zoom longer from back there instead.
Baseline Camera Settings to Start With
Dial in a fast shutter and let Halona’s cannon-blast spray do the rest. Start around 1/1000 to 1/2000 sec and treat it as your default. Pair it with f/5.6 to f/8 so the black lava ledge and the turquoise pocket of water both stay crisp. Keep ISO at 100 to 400 in bright sun. Bump it to 800 or 1600 only when clouds roll in or drizzle dims the scene. Use a lens hood and a microfiber cloth to guard against salt air and spray crusting on your front element as the sun bakes the mist.
Flip to continuous high-speed burst and set autofocus to AF-C. Use a single focus point on the blowhole mouth. The key is to keep that point steady while the ocean hisses and thumps below you. Frame a touch wide at 24 to 35mm equivalent. Shoot RAW or turn on highlight warnings so the white spray keeps its texture. If you’re on a crop-sensor body, match that view with 16 to 24mm. You’ll still feel close enough to listen.
Fast Shutter Speeds That Freeze Spray
Crank your shutter speed and let Halona’s spray turn into a field of sharp, flying beads instead of a milky blur. Start at 1/1000s when surf is up. If trade winds kick sand and mist across the lookout, push to 1/2000s or even 1/4000s so the jet looks like glass shards in sunlight. To balance harsh midday contrast, time your visit so you can ride the Waikiki golden hour trolley and arrive when the low sun turns the spray into glowing, backlit crystals.
To keep that speed, open to f/5.6–f/8 and lift ISO. Try ISO 400 in bright noon light, then climb to 800–1600 when clouds flatten contrast and spray whitens the scene. With a 200–400mm lens, you’ll beat hand shake best above 1/1000s anyway, so you’re solving two problems at once. Pre focus on the blowhole zone and fire just before an incoming set.
- Hear the boom, then catch the instant it explodes
- See droplets sparkle like salt on black lava
- Feel safe on the railing while your frame gets wild in every shot.
Burst Mode Timing: Shoot the Whole Cycle
Riding the whole blowhole cycle is where burst mode earns its keep. Set your camera to its fastest drive, often 10 to 20 fps, because the action races from first splash to peak plume to fading mist in 1 to 2 seconds. Fire as the incoming wave compresses into the cave and you’ll catch that deep whoomp turning into white confetti. Much like shooting on a moving trolley, using a stable stance and firm grip helps reduce shake and keeps your composition steady during rapid burst sequences.
Watch a few sets before you shoot. At Halona, mid to high tide surges often make fuller, slower puffs, so you can start a hair earlier. Lock your exposure and focus so nothing hunts mid burst. Use back button AF or AF C with tracking. Keep your fast shutter and adjust ISO if needed. Shoot continuous RAW in short 3 to 7 second bursts, Even though it feels like overkill, it saves your buffer and delivers a perfect frame every cycle. You’ll hear the spray hiss below.
Expose for White Spray Against Dark Lava
You’ve got to meter for the bright white spray, not the dark lava, or your camera will turn that foamy plume into a blown-out mess. Dial in about -1 to -2 EV or spot-meter the brightest splash, then lock it in and reframe while the rock stays moody and the shutter chatters. Later you can lift the shadows from the lava in RAW, but you can’t rescue spray detail once it’s clipped, so protect those highlights like they’re your last dry lens cloth. While you’re out shooting Halona, you can also plan time to frame the trolley at the most picture-perfect Waikiki stops for an extra set of dramatic Hawaii shots.
Meter For Highlights
How do you keep that brilliant white burst of foam from turning into a flat, detail-free blob against Halona’s black lava? Meter the brightest spray, not the lava. Use spot or highlight-weighted metering, aim at the foamy crest, and lock exposure before the surge. Shoot RAW so you can lift shadows later while whites keep texture. Set 1/1000s or faster, keep ISO low, and trust that spray-based reading. Review with highlight warning so blinkies don’t steal your sea lace. With Diamond Head in the distance, every boom feels close. You’ll see tiny ripples of gray in the white plume, like frosted glass, and that’s the detail you came for at Halona today. If you’re exploring Oʻahu by trolley, plan time at nearby Waikiki Trolley photo stops to capture contrasting city and coastline scenes with the same highlight-first approach.
- Booming surf, salty air
- Sparkling foam, sharp edges
- Windy jokes, dry lens
Use Exposure Compensation
Dial in exposure compensation before the next boom and watch the spray pop instead of turning into a chalky blob. The dark lava can fool your meter, so bump exposure to +1 or even +2 stops to keep the white burst detailed. Switch to spot or center-weighted metering and aim at the spray, not the rocks. Pair it with a fast shutter, around 1/1000 to 1/2000s, and you’ll freeze crisp beads and wispy threads. Take a quick test shot, then check the histogram. If the right edge spikes and clips, dial compensation down a notch. Lock that setting in aperture or shutter priority. Recheck as clouds shift or higher tides roll in, because backlight might take you somewhere new. Keep your lens hood ready. Because coastal conditions change fast, always stay aware of your surroundings and treat any water warnings you’ve checked as guidance, not guarantees.
Recover Shadows Carefully
When the blowhole throws a white burst against that ink-black lava, expose for the spray first and let the rocks fall dark for a moment. Use spot or highlight-weighted metering on the foam, or dial in –1 to –2 EV, then fire at 1/1000 to 1/2000s and bump ISO to 400 to 1600. Turn on blinkies and pull exposure down until they vanish. Shoot RAW so you can lift lava shadows later with local edits, not global haze.
- You’ll hear the boom and catch the glittering mist.
- The lava stays velvety, not crunchy and noisy.
- Your landscape photography frame feels dramatic, not washed out.
Watch the histogram’s right shoulder for clipping, and add a graduated ND only if the sky forces it at sunset.
Keep Contrast: Manage Flare and Haze
Even if the ocean air feels clean and bright, Halona Blowhole can wash your contrast away in a heartbeat. Stand upwind when you can so the mist drifts past you, not into your glass. Watch the sun angle too; a small shift left or right can drop flare and bring back those black lava edges. A circular polarizer helps on clear days. Rotate it until the glitter on the waves calms down, then bump exposure by +1 to +2/3 EV to make up for lost light.
Keep ISO at 100 to 400 and push shutter speed to 1/500s or faster. Frozen droplets look like crisp beads instead of a gray veil. Later, lift midtones and add a touch of clarity around +10 to +25. Use dehaze sparingly so your expensive gear’s files stay clean. You’ll hear the boom, see the spray, and keep punchy color in the rocks.
Protect Your Camera: Cover, Hood, and Cloth Workflow
Punchy contrast is great, but salty mist doesn’t care how sharp your blacks look. Give your camera armor before you lean over the lava shelf. If it’s weather sealed, still slip on a rain cover or a heavy plastic bag and tape a tight lens opening so you can reach the dials. Salty grit loves buttons, so keep covered.
- You hear the thump of surf and feel that cold spray try to sneak in.
- You watch droplets skid off a deep lens hood instead of your front element.
- You get relief when a microfiber cloth is ready in a waterproof pouch.
Keep the hood mounted and, on wide shots, tilt the camera slightly down to dodge side spray. Shoot the blowhole at 1/1000s or faster in short bursts. Step back between series, pat the glass dry, don’t rub, and your odds of a clean frame jump much higher.
After-Shoot Gear Check: Salt, Drying, and Cleanup
After you’ve packed up and the roar of Halona fades behind you, treat the parking lot like a tiny rinse station. Use a squeeze bottle of fresh water or a damp microfiber to lift salt spray off your camera body and lens barrel. Blot dry right away. Don’t let that gritty ocean air sit on your electronics.
Pop the battery and card from your Sony A7IV and seal them in a plastic bag with silica gel. At home, clean lenses and filters with lens solution and a fresh microfiber. Wipe in gentle circles. Then hold the glass under bright light and chase any leftover salt spots. Set everything to air-dry 24 to 48 hours in cool shade with a fan, not heat. Check tripod legs and mounts too. Flush metal parts, then add a touch of approved grease. Your next North Shore stop will thank you for it.
Frequently Asked Questions
What Permits or Photography Restrictions Apply at Halona Blowhole?
You don’t need permits for casual photos/videos from the lookout, but Permit requirements apply for commercial shoots with crews, rigs, or paid talent, check Honolulu or DLNR. Drones face restrictions; follow FAA rules and stay public.
Is Sunrise or Sunset Better for Light and Fewer Crowds?
Sunrise preferable, you’ll get softer, cooler light and far fewer crowds. You can arrive 30–60 minutes before dawn and find space. Sunset gives warmer drama, but you’ll face heavy crowds unless you arrive early.
Can I Use a Tripod Here, and Where Is It Allowed?
Yes, you can use a tripod in the Halona Blowhole lookout and designated viewing areas. Follow Tripod etiquette: stay off cliff edges and railings, set up several meters back, splay legs wide, obey closures, and move.
Are Drones Permitted Near Halona Blowhole and the Lookout?
Usually no, you’ll face Drone prohibition at the crowded Halona Blowhole lookout; freedom to fly meets strict rules. Check DLNR/county and FAA airspace, carry TRUST/Part 107, obey signs, and don’t launch if staff says no there.
How Can I Keep Salt Spray From Ruining My Photos Afterward?
You’ll save your shots with Lens maintenance: wipe salt spray off immediately, rinse the front element with distilled water, then dry with microfiber. Keep gear sealed between bursts, and blow out grit when you’re done.
Conclusion
Now you know the trick: stand upwind on the paved lookout and stay 10 feet back. Let your telephoto do the walking, then duck behind a low rock and fire quick bursts at 1/1000. Hear that hollow boom and see the white spray pop against black lava? Keep your hood on, blot droplets with a microfiber, and don’t baby the gear later. Rinse it with fresh water and call it a win for next time.
